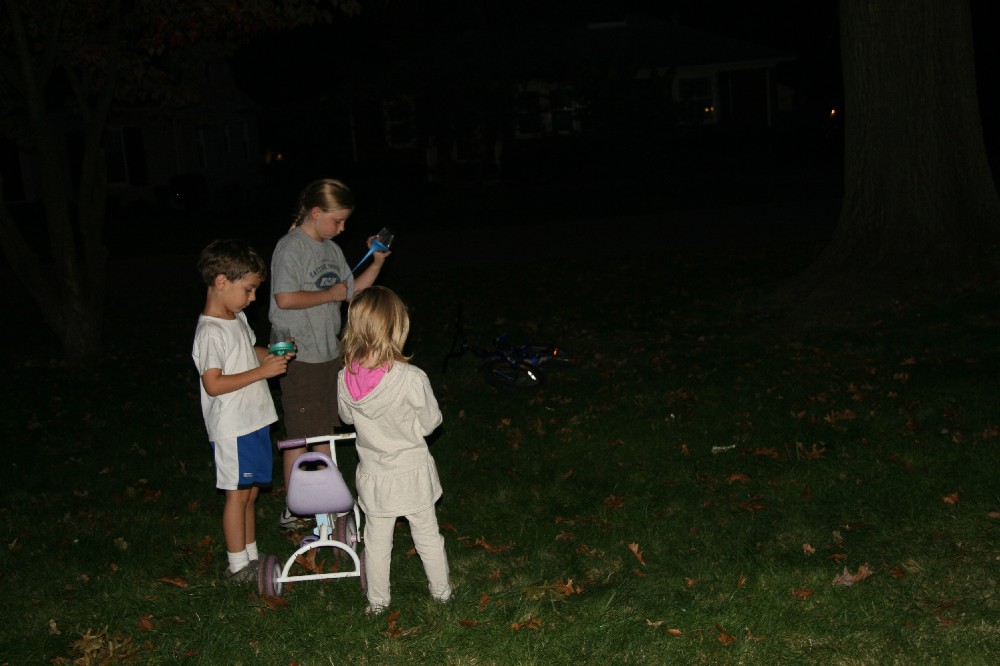
Last month Olivia had a sleepover with two of her cousins, both of whom are very active. We wanted to do something outdoors that would be fun for all ages. I came across this idea on pinterest.
It's very simple, but lots of fun. We made marshmallow shooters out of a disposable cup and a balloon, both of which I had left over from Olivia's birthday party. I did find that the smaller the cup, the more accurate it shoots.
For a great tutorial on how to make them, check out this blog.
At night, we had a war and in the morning we used the launchers for a distance competition (who can shoot their marshmallow the farthest). They had a great time.
This could easily be adapted for indoors using pom-poms (as the original post suggests).
This was a little hard for my just turned 4 year old to operate, but it was definitely age appropriate for her 6 and 10 year old cousins - and her parents :)
Let the wars begin!
Showing posts with label Games. Show all posts
Wednesday, November 23, 2011
Homemade Ring Toss
This is a fun activity that we did when Olivia had some friends over. I found the idea on pinterest - just looked at the picture and started creating. It was originally posted on this blog.
Olivia had a friend over and they were starting to get a little stir crazy which usually results in a fight. So, in order to avoid the downward slope we were heading toward, I pulled out 6 paper plates, cut out the centers and gave them each three to paint. They had a lot of fun painting and played well together the rest of the day.
While they were painting, I found a small box (from guacamole dip, similar in size to a box that holds soup or dressing mixes). I grabbed a paper towel roll, traced it on the box, cut out the hole (just inside the line to make a tight fit) and stuck the paper towel roll in the hole.
On the original post, she cut 4 slits in the bottom of the roll, folded the tabs out and taped them to the bottom of another paper plate.
A few days later when Olivia had an older cousin over they decided to pull out the game and play.
We used a baton that we had laying around as the line and found that the paper rings don't fly that far so we had to make the line much closer than we originally thought.
Happy playing!
Olivia had a friend over and they were starting to get a little stir crazy which usually results in a fight. So, in order to avoid the downward slope we were heading toward, I pulled out 6 paper plates, cut out the centers and gave them each three to paint. They had a lot of fun painting and played well together the rest of the day.
While they were painting, I found a small box (from guacamole dip, similar in size to a box that holds soup or dressing mixes). I grabbed a paper towel roll, traced it on the box, cut out the hole (just inside the line to make a tight fit) and stuck the paper towel roll in the hole.
On the original post, she cut 4 slits in the bottom of the roll, folded the tabs out and taped them to the bottom of another paper plate.
A few days later when Olivia had an older cousin over they decided to pull out the game and play.
We used a baton that we had laying around as the line and found that the paper rings don't fly that far so we had to make the line much closer than we originally thought.
They had a great time and we have since pulled it out on many occasions. It's actually been a much bigger hit than I ever guessed it would be!
Happy playing!
Tuesday, October 4, 2011
Obstacle Course
Do you ever feel like your kids are about to climb the walls with energy on a day when the weather isn't permitting any outdoor fun? If so, you'll like this activity as it allows the kids to get some energy out while working on their coordination.
I got the idea from my daughter's gymnastics class where they set up an obstacle course for part of the class and the kids love it. We all build tents or forts with our kids, why not set up an obstacle course? It takes about the same amount of time, and depending on their personality, can keep them entertained for much longer than a fort.
We started the course with a balance beam made out of painter's tape. On the balance beam, they can practice walking forward, backward, sideways, hopping, or whatever you can come up with.
I got the idea from my daughter's gymnastics class where they set up an obstacle course for part of the class and the kids love it. We all build tents or forts with our kids, why not set up an obstacle course? It takes about the same amount of time, and depending on their personality, can keep them entertained for much longer than a fort.
We started the course with a balance beam made out of painter's tape. On the balance beam, they can practice walking forward, backward, sideways, hopping, or whatever you can come up with.
Next obstacle was to climb over the ottoman/coffee table. Use what you have,but try to find things for the kids to climb over and crawl under.
After climbing over the ottoman/coffee table, they had to crawl through the tunnel (blankets draped over the kitchen table).
From there, they went back toward the start and had to jump in the boxes (again, made of painter's tape), two feet where there are two boxes and one foot where there is one box. After the boxes, I simply put a start line and a finish line for the kids to see how far they can jump.
Then they were back at the beginning and could start all over again. I recommend doing this with at least 2 kids as they seem to be better entertained by this in a group. Also, playing some music makes it more fun :)
I hope you enjoy trying this with your kids.
Happy playing!
Molly
Tuesday, June 7, 2011
Skip to my Letters!
Supplies:
Colored Construction PaperMarker
Laminator & Laminating Pouches (optional)
To create this game, simply cut squares (or rectangles) of construction paper and draw shapes, letters, and/or numbers on each square. If you want the game to last longer, you can laminate your game pieces as I did. I made shapes, letters, and numbers so that the game can advance with my daughter - they have letters on one side and shapes/numbers on the other.
To play, simply lay your game pieces out on the floor and call out a game piece (such as: yellow, yellow square, square, or A, etc.) depending on their skill level. When you call out a game piece, your child's job is to find that game piece and jump on it. There is no way to "win" the game and no way to signal the "end" just tailor it to your child. We quit when she seems like she's done or when I get overly bored.
I wrote the names of the shapes to give her exposure to the words.
Today, we played a variation where I put an oval at the top and had her jump on each oval until she reached the top - signaling an end to that round and a win for her. I just changed the shape at the top for each round.
She got really excited when she won!
Then we moved on to letters. To begin with, I didn't want to overwhelm her, so I just put out 6 letters - some of which I knew she was familiar with and a few that would be somewhat new to her. She only needed a few hints and really enjoyed this version as well. We'll add letters and switch out letters until she recognizes the entire alphabet.
Nice thing is this doesn't take up much storage room and you can use it again and again.
The game was inspired by a game found in Gymboree's Toddler Play book, which you can find here. We started playing this game months ago and now I can't remember which game inspired this one, but either way, it's a great resource.
It's simple, but my daughter LOVES it - requests it all the time and it's great for working on the basics. This is how she learned her shapes and now we're moving on to letters.
As always, if you play this game and take pictures or come up with a new variation, we'd love to see and hear about it!
Thanks for stopping by and happy playing!
Sunday, May 29, 2011
Hopscotch - an old classic! (scroll down for pictures)
As the banner at the top of my blog indicates, this blog was born out of a rainy week with 6 kids in an 800 sq. foot home! One rainy week turned into two rainy weeks and the second week had 5 kids...whew. I just finished the second week and am grateful it's over - trying to entertain that many kids in that small of a house with nothing but rain outside can prove to be a bit daunting. Hopefully none of you find yourselves in this predicament and you are simply looking for some fun activities for a rare rainy day.
Over the last two weeks we tried a lot of different games, activities, and crafts - some worked better than others. I'm starting with hopscotch not because it was my favorite (those are yet to come) but because it is the only activity I actually got pictures of (since I wasn't planning to blog about them when we did them). Although it wasn't my favorite, it definitely worked well and we will do this again in my home. Being the mother of only one child, this is a great game as it can be played alone or with many children.
This game would work well for school age children as well, but I used it for preschoolers and found that even though they didn't completely get the concept of the game, it was great practice in gross motor skills (i.e. hopping, throwing with accuracy, balance, etc.) and it also works on number recognition (up to 9). In any event, getting preschoolers up, hopping, and throwing when it's rainy outside is a good thing and they enjoyed it.
Supplies:
Painter's Tape
Objects (toys, coasters, sticks, etc.) to use for "markers"
You could also use masking tape - I just happened to have painter's tape laying around and I like it because it comes in fun colors and it's made to be removed.
For the objects (used for markers), try to avoid balls or toys that roll easily as it could become pretty frustrating especially for younger children who will find it a challenge just to land their marker in the correct space.
I made my hopscotch board on our rug, but it could be done on wood, ceramic, vinyl, laminate, etc. if you use painter's tape as it will come up pretty easily. If you have an unfinished basement, you could even go the classic outdoor route and make it with chalk on your cement floor - and clean it up with a bucket of water and a large sponge when you want to remove the game board.


For those of you who aren't familiar with the rules of hopscotch, here's how we played:
Start by trying to throw your "marker" (we used small toys and coasters) into the first space. If you land your marker on the correct space, you may hop your way to the end and back - avoiding the space containing your marker. One foot on 2 (since your marker is on 1), one foot on 3, two feet down at 4 & 5, one foot on 6, two feet down on 7 & 8, one foot on 9, turn around, go back.
When you get to your marker, bend down, pick it up, and hop to the end.
If you complete this "level" successfully, you may go on...now you try to land your marker in the second space and so on. The child's turn continues until they miss the space they are trying to land in.
For older children you may want to end their turn if they accidentally put two feet down on a one foot space or if they forget to pick up their marker on their return to the start, etc. to keep the game moving.
With preschoolers, I only ended their turn when they missed the space they were aiming for.
The only thing that changes with the second player is that they avoid both the space their marker is on and the space the other player's marker is on.
Winner is the first one to get their marker all the way to the ninth space.
As the players move beyond the first few spaces, they may try walking up to the space they are trying to land in. Our rules were that they had to remain behind the line at the bottom of the hopscotch board for all throws.
I played this game with three kids ages: 2 1/2, 3 1/2 and 4 1/2 - the 2 1/2 year old had very loose rules and just enjoyed running up and down the board, the 3 1/2 and 4 1/2 played by the rules and were able to complete the game successfully. And in the short time we played, I saw one child's hopping/balancing skills improve!
I hope you enjoy pulling out this classic in your home. If you try this with your children and make a variation I haven't thought of or find some helpful tips, please share them with the rest of us - we would love to hear from you!
Over the last two weeks we tried a lot of different games, activities, and crafts - some worked better than others. I'm starting with hopscotch not because it was my favorite (those are yet to come) but because it is the only activity I actually got pictures of (since I wasn't planning to blog about them when we did them). Although it wasn't my favorite, it definitely worked well and we will do this again in my home. Being the mother of only one child, this is a great game as it can be played alone or with many children.
This game would work well for school age children as well, but I used it for preschoolers and found that even though they didn't completely get the concept of the game, it was great practice in gross motor skills (i.e. hopping, throwing with accuracy, balance, etc.) and it also works on number recognition (up to 9). In any event, getting preschoolers up, hopping, and throwing when it's rainy outside is a good thing and they enjoyed it.
Supplies:
Painter's Tape
Objects (toys, coasters, sticks, etc.) to use for "markers"
You could also use masking tape - I just happened to have painter's tape laying around and I like it because it comes in fun colors and it's made to be removed.
For the objects (used for markers), try to avoid balls or toys that roll easily as it could become pretty frustrating especially for younger children who will find it a challenge just to land their marker in the correct space.
I made my hopscotch board on our rug, but it could be done on wood, ceramic, vinyl, laminate, etc. if you use painter's tape as it will come up pretty easily. If you have an unfinished basement, you could even go the classic outdoor route and make it with chalk on your cement floor - and clean it up with a bucket of water and a large sponge when you want to remove the game board.
I made numbers in each space which took a little time, but I wanted to work on number recognition with the kids. You could certainly leave the spaces empty if you don't want to take the time. You could also tape a piece of colored construction paper in each space or use different shapes or letters to tailor the "lesson" to your child's level.
For those of you who aren't familiar with the rules of hopscotch, here's how we played:
Start by trying to throw your "marker" (we used small toys and coasters) into the first space. If you land your marker on the correct space, you may hop your way to the end and back - avoiding the space containing your marker. One foot on 2 (since your marker is on 1), one foot on 3, two feet down at 4 & 5, one foot on 6, two feet down on 7 & 8, one foot on 9, turn around, go back.
When you get to your marker, bend down, pick it up, and hop to the end.
If you complete this "level" successfully, you may go on...now you try to land your marker in the second space and so on. The child's turn continues until they miss the space they are trying to land in.
For older children you may want to end their turn if they accidentally put two feet down on a one foot space or if they forget to pick up their marker on their return to the start, etc. to keep the game moving.
With preschoolers, I only ended their turn when they missed the space they were aiming for.
The only thing that changes with the second player is that they avoid both the space their marker is on and the space the other player's marker is on.
Winner is the first one to get their marker all the way to the ninth space.
As the players move beyond the first few spaces, they may try walking up to the space they are trying to land in. Our rules were that they had to remain behind the line at the bottom of the hopscotch board for all throws.
I played this game with three kids ages: 2 1/2, 3 1/2 and 4 1/2 - the 2 1/2 year old had very loose rules and just enjoyed running up and down the board, the 3 1/2 and 4 1/2 played by the rules and were able to complete the game successfully. And in the short time we played, I saw one child's hopping/balancing skills improve!
I hope you enjoy pulling out this classic in your home. If you try this with your children and make a variation I haven't thought of or find some helpful tips, please share them with the rest of us - we would love to hear from you!
Subscribe to:
Posts (Atom)